
Setup Compliance Requirement Types
- A Compliance Requirement can either be set as a Document or a Checklist
- This segment will be divided into two sections: setting up a requirement as a Document or as a Checklist
- If a requirement is set as a “Document” a Document Types need to be set up first
- Compliance Requirements can also be set per Relationship Type
- For more information on Compliance Requirements refer to Compliance Requirements
Document type
Navigate to the Document types section on the Main Menu under (1)System and then select (2)Document types. (System -> Document types)
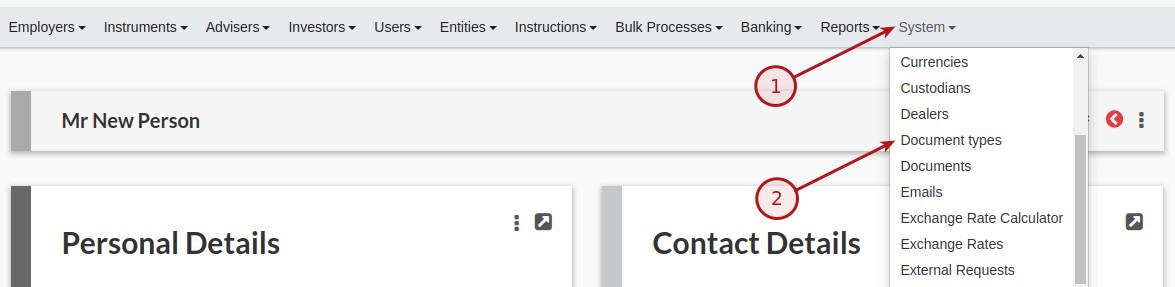
You then have the option to (1)Add, (2)Edit or (3)Delete a Document types

Add a new Document type by selecting the (1)Add button

The following fields are available:
Type : Input the type of Document, i.e. ID Proof, Application Form
Default Label : Text as displayed on the system, i.e. Drop-down list
Class : Select the Class to be assigned with, i.e. Entity, Account
Has expiry date : Does this document have a expiry date
REASON Section
At the button of the screen there is a section where default reasons can be created to be used in the system. By selecting the Add button in the REASON section the user will be prompted to enter a reason and on completion selecting the Ok button, the reason will then appear in the list.
Populate the fields and select the Save button
Requirement type
Requirement types now allow for multiple Sub Classes within a Class providing more flexibility with Compliance Requirements
Navigate to the Requirement Types section on the Main Menu under (1)System and then select (2)Requirement types. (System -> Requirement Types)
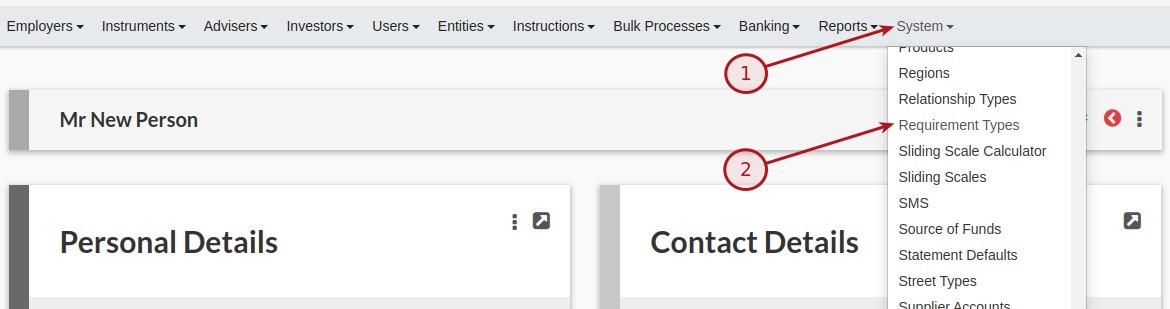
You have the option to (1)Add, (2)Edit or (3)Delete a Requirement types (refer to NOTE below)
NOTE: If the Requirement types is deleted it will be removed from the Requirement card

(1)Add a new Requirement type by selecting the (1)Add button
Document Option
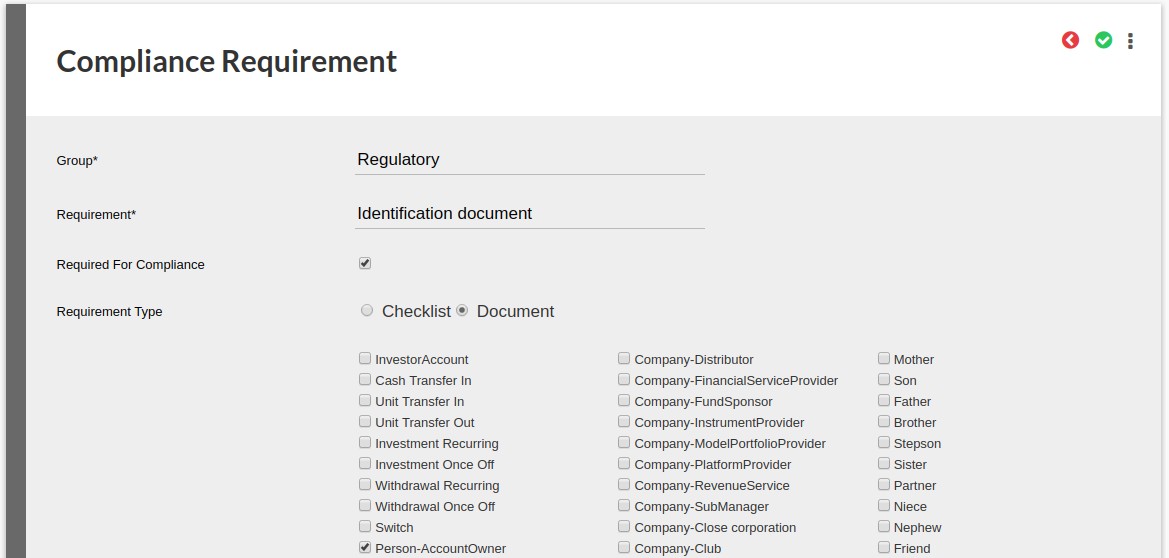


Checklist Option

The following fields are available:
Group : Input the Group name , i.e. Banking, Compliance
Requirement : Input a name for the requirement, i.e. Expired ID
Required for Compliance : Select if it is a requirement for compliance
Requirement Type : Select Checklist or Document *Note
Requirement Class : Select the Class to be assigned with
Document Type : *Note
Note*: If Document is selected a Document Type with a drop-down will appear to select the appropriate Document type as created in the previous section.
REASON Section
At the button of the screen there is a section where default reasons can be created to be used in the system. By selecting the Add button in the REASON section the user will be prompted to enter a reason and on completion selecting the Ok button, the reason will then appear in the list.
Populate the fields and select the Save button
Last Updated on 6 years ago by Tinus Burger