
Add Email
- An email can be sent to an individual or in bulk.
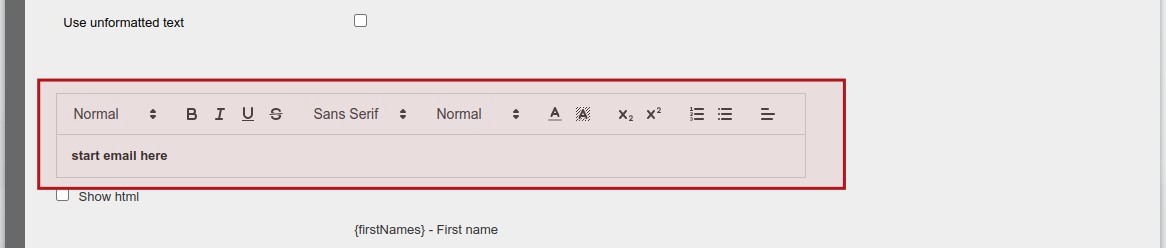
- The option is available to generate the Body of the email as plain text by using the text widget or as unformatted text by selecting the Use unformatted text tick box.
- The other parameters eg. Recipient and Subject will remain the same for both options.
- The button to send the plain text email is Send Email and for the Unformatted text email is Send Unformatted Email.
Text widget
- This is the default option.
- Refer to the sections below labelled as Body: for more details.
Unformatted text
- When the Use unformatted text is selected the Text widget will not be avaiable but a Unformatted body section will be displayed.
- The user then have the ability to custimise the email body by using html code.
- As stated above the other parameters eg. Recipient and Subject will remain the same as outlined below.

- Example:

Individual
Navigate to the Communication Card – More Actions and select Add Email
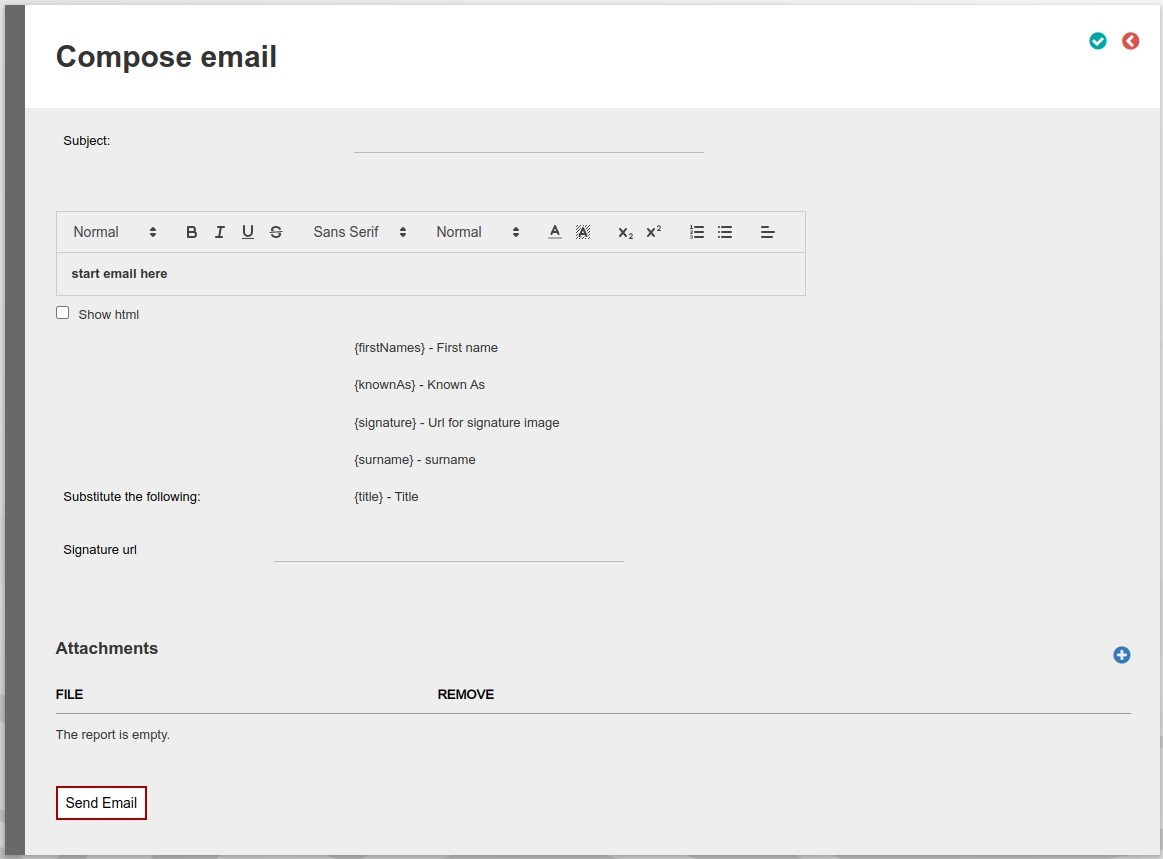
- The Recipient: field will be populated from the Email captured on the entity. If not captured on the entity the field will be empty.
- Subject: will be the subject of the email
- Body: The section highlighted as start email here will be the body of the email, and the following options are available:
- Heading -> Normal selected by default; B -> Bold text; I -> Italic text; U -> Undeline text; S -> Strikethrough text; Font -> Default set as Sans Serif; Font size -> Normal selected by default; Font colour; Background colour; Subscript; Superscript; Numbering; Bullets; Alignment
- Listed under Substitute the following: is a list of substitutes that can be used in the body of the email.
- The {signature} substitutes makes use of the Signature url refer to Add or Edit Images/Logo’s
- Show html, this will show the html code
- Attachments, add attachments to the email
- To send the Email select the Send Email button.

Bulk
On a Bulk level we have the same fields as above with the exclusion of the Recipient, the Email captured on the entity will be used.
Bulk Email’s can be sent from:
- All Investor Accounts Navigate to: Investors -> Contracts -> More Actions ->Send Email
- Investor Accounts on an Adviser Navigate to the Adviser Clients Card -> View Details -> More Actions -> Send Email
- Investor Accounts on a Brokerage Navigate to the Brokerage Clients Card -> View Details -> More Actions -> Send Email
- Navigate to:
- Investor Accounts on a Product Navigate to the Product via System -> Products -> Select the product -> More Actions -> Contracts -> More Actions -> Send Email
- Investor Accounts on a Instrument Navigate to the Instrument via Instruments Menu -> Select the Instrument -> More Actions -> Contracts -> More Actions -> Send Email
- Entities linked to a Client classifications Navigate to System -> Client classifications -> Select one -> More Actions -> Entities -> More Actions -> Send Email
Add or Edit Images/Logo’s
Images/Logo’s form part of the documents, navigate to System -> Documents
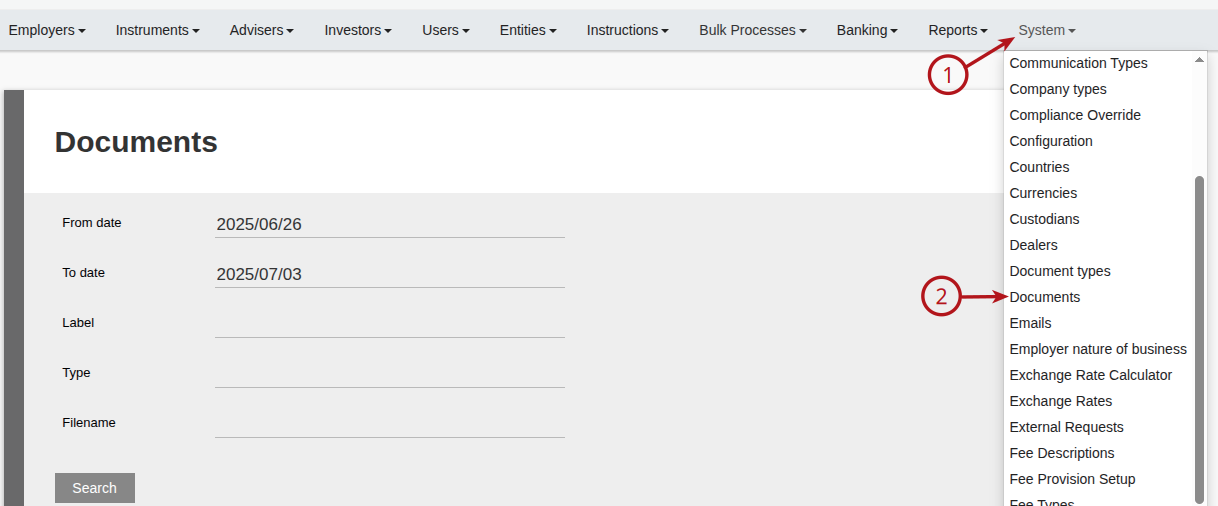
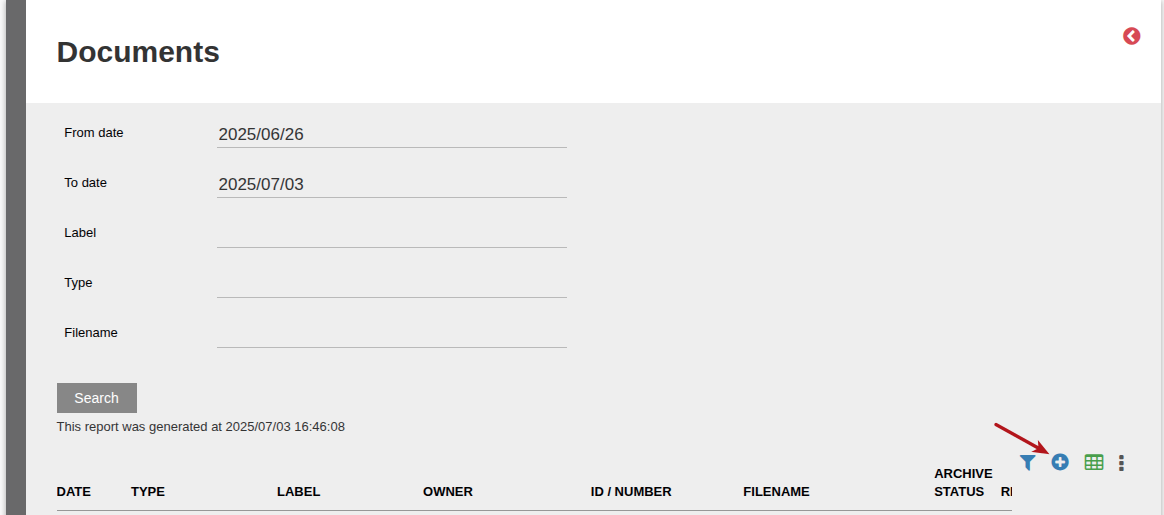
Select the Add button to add a new Image/Logo
Enter the details
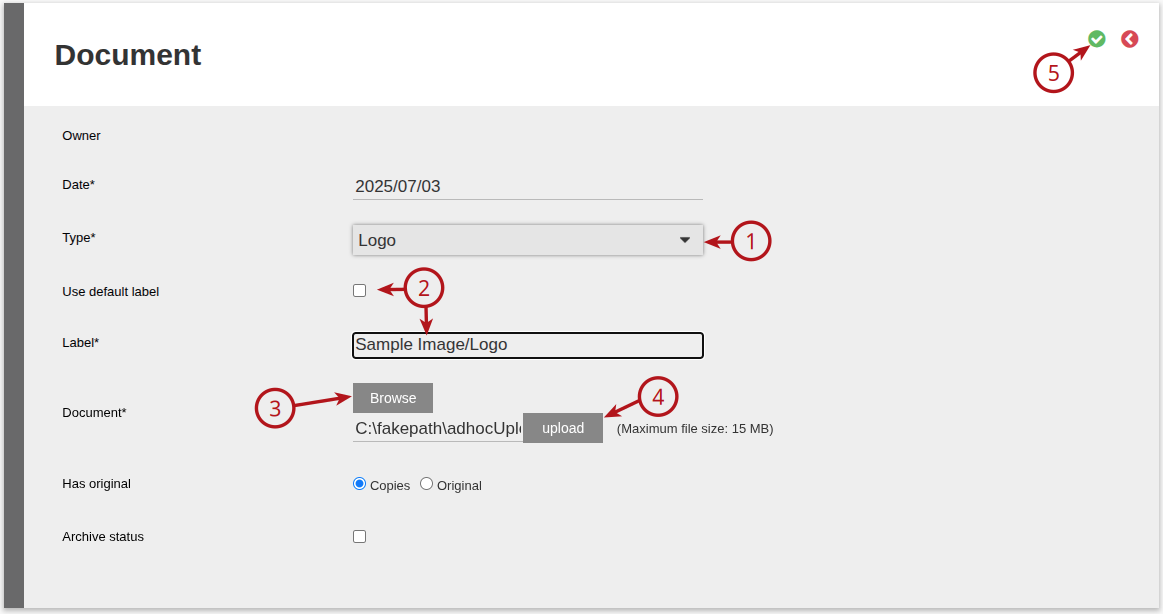
- 1. Select the Type* as Logo
- 2. To change the label un-tick “Use default label” and add a Label*
- 3. Browse for the Image/Logo
- 4. Select Upload
- 5. Select the Save button
The Image/Logo that was added will now reflect in the list, take note of the Filename as this will be used in the notification message

Sample.jpeg – Refer to the Image/Logo that was added above
Depending if you are working on test or production the word “test.configuration.co.za” need to be replaced accordingly
- e.g. Test: https://test.configuration.co.za/documents/Sample.jpeg
- e.g. Production: https://secure.configuration.co.za/documents/Sample.jpeg
The configuration “test.configuration.co.za” need to be replaced with the configuration e.g.finworks.biz
i.e. “test.finworks.biz”
This link now needs to be places in the Signature url e.g. https://test.finworks.biz/documents/Sample.jpeg
Last Updated on 1 year ago by Debra Hart