
Finswitch Instruction file to send to Management Company
There are two options to send instructions to a Management Company via Finswitch.
-
- Download the finworks generated file, and upload manually on Finswitch
- Use Realtime integration to send the generated file to Finswitch automatically (this can be done by sending one Dealer instruction at a time, once created, or sending multiple Dealer Instructions while creating the instructions.
See this section of the help file to do the necessary configuration for this to work.
Creating a Dealer instruction and getting the Finswitch File
When a dealer instruction has been created, go to the dealer instruction (select the amount hyperlink)
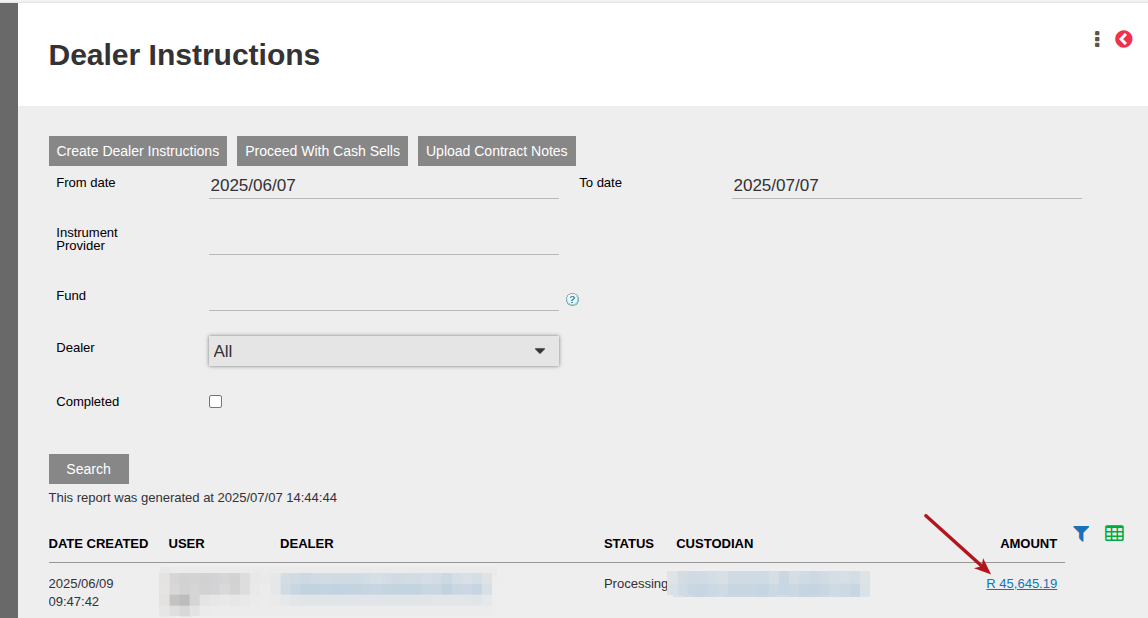
Select View Details, then Details

To manually download the file, and upload it yourself onto Finswitch, under more actions select Finswitch download:
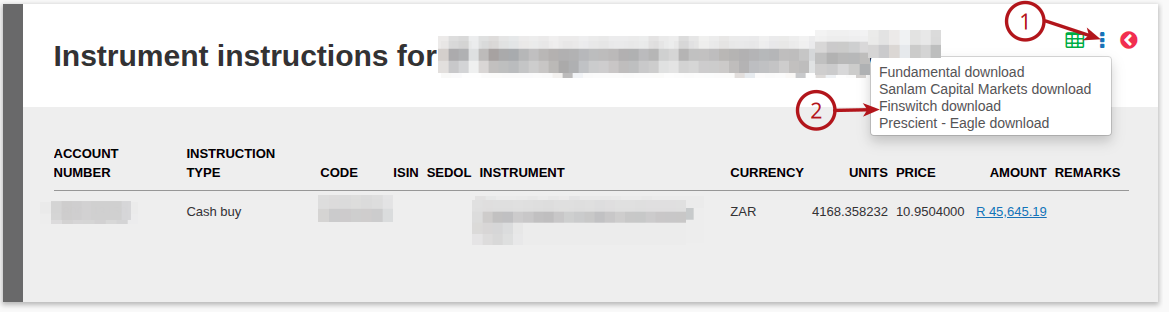
The Finswitch dealer instruction file will be downloaded. See example FinworksInstructionFile
Automatically send one Dealer Instruction at a time
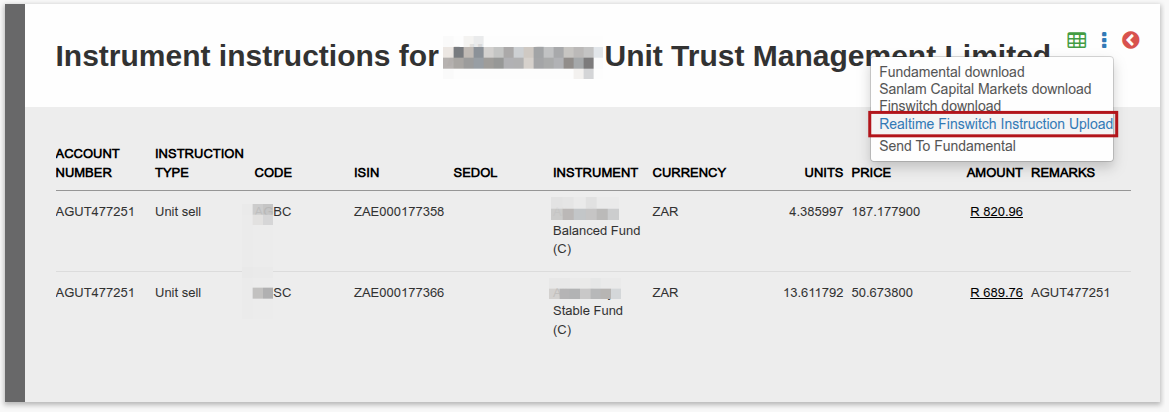
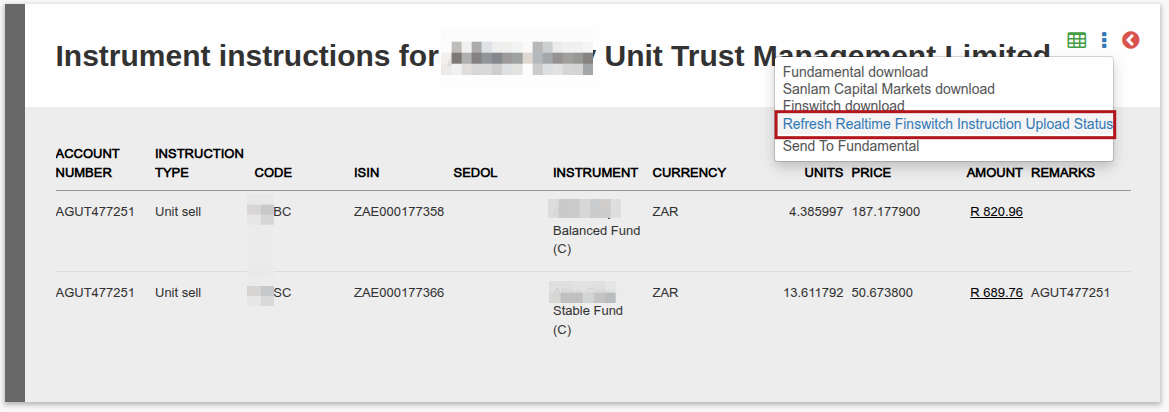
Following the same steps as above, rather select Realtime Finswitch Instruction Upload to send one Dealer Instruction at a time, after it’s been created:
If successfully sent to Finswitch, you will see the following pop-up which shows you the unique ID received from Finswitch, click on Ok.
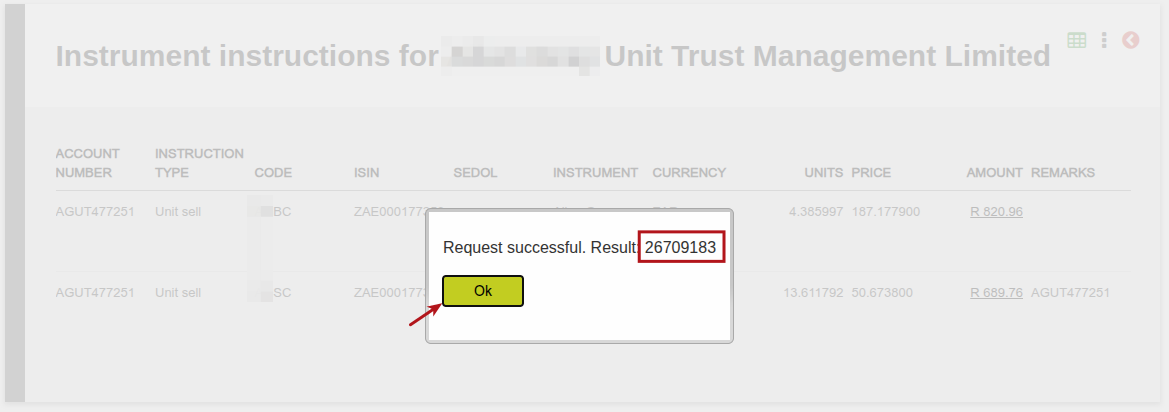
This means the request was sent to Finswitch. Thereafter click on the three dots again at the top of the page, and select Refresh Realtime Finswitch Instruction Upload Status. This will fetch the latest status from Finswitch, indicating whether the request was sucessfully created on Finswitch or not.
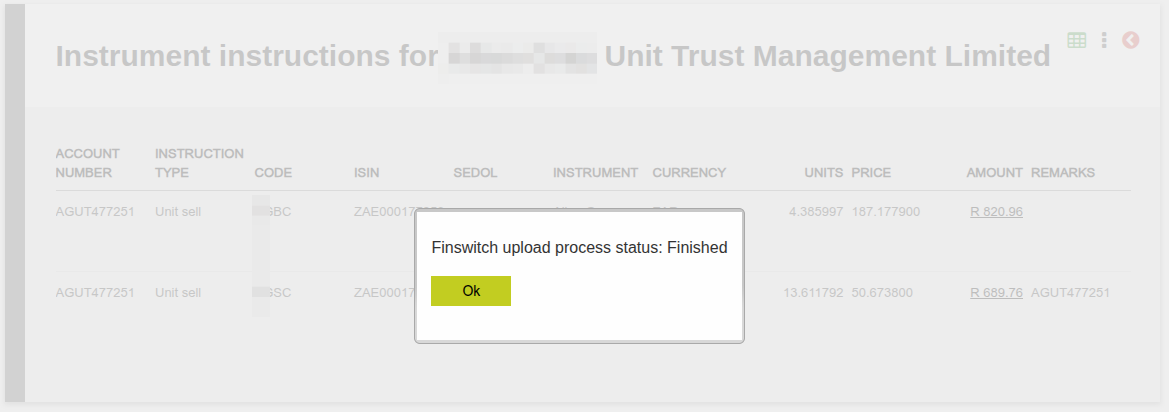
Once successfully received in Finswitch, you will get the following pop-up with status Finished. This means the Transaction Request was successfully created on Finswitch.
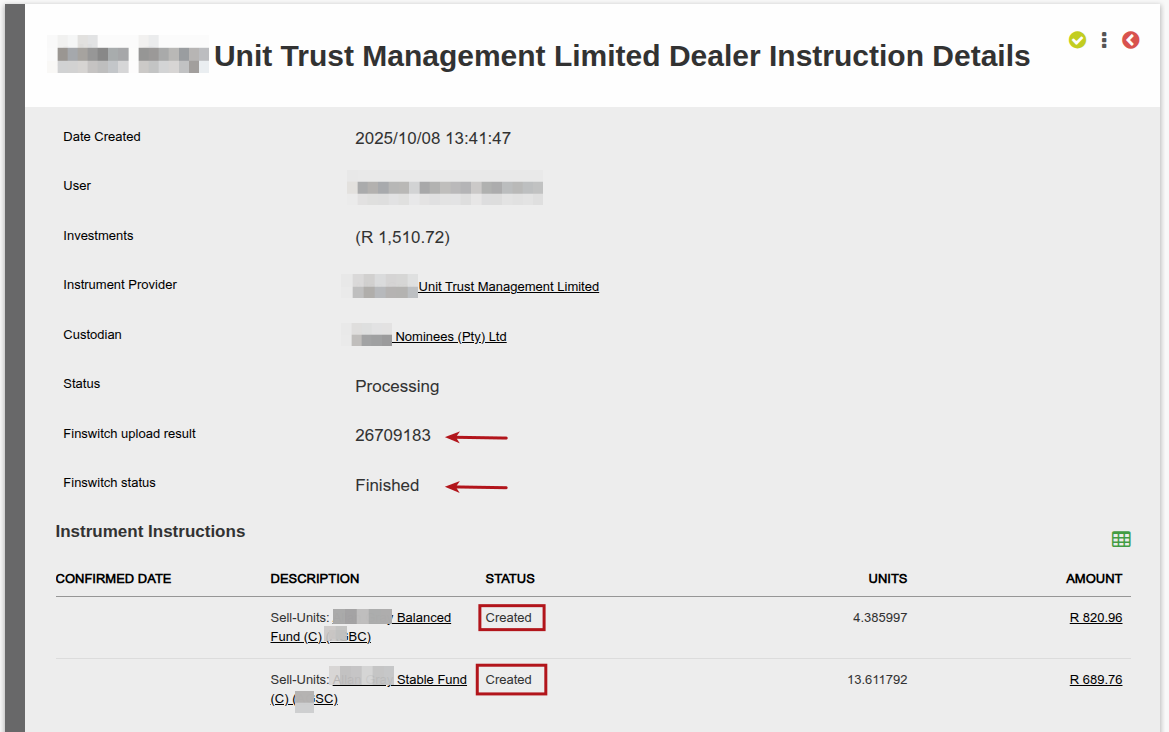
If you now return to the Dealer instruction, you will see the following information:
- Finswitch upload result will show you the unique ID for the request in Finswitch, which you could use on Finswitch to find this specific transaction request.
- Finswitch Status which indicates the status of this transaction request upload to Finswitch, which in this case is Finished. Possible statuses could be “Busy”, “Error”, “Finished”, “Pending”, “Aborted” If “Error”, all errors will be visible. If “Finished”, any warnings will be visible.
- While Finswitch status is either “Error” or “Aborted”; the result of the previous upload will be cleared and the file can be uploaded again. This means that under more actions on the below screen you will again have the option for Realtime Finswitch Instruction Upload, and the new response ID will be stored.
- The Instrument Instructions at this stage will show Created.
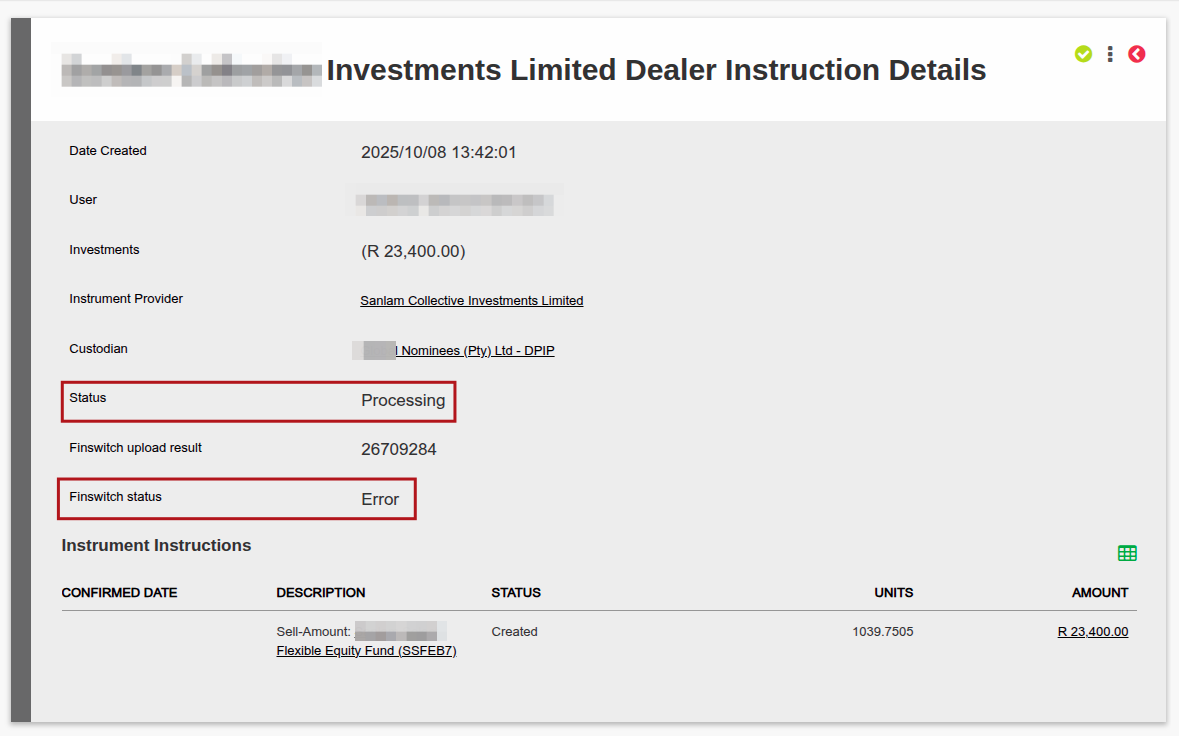
An example error response will look like this, for a missed cut-off. In this case the instruction must be processed manually.
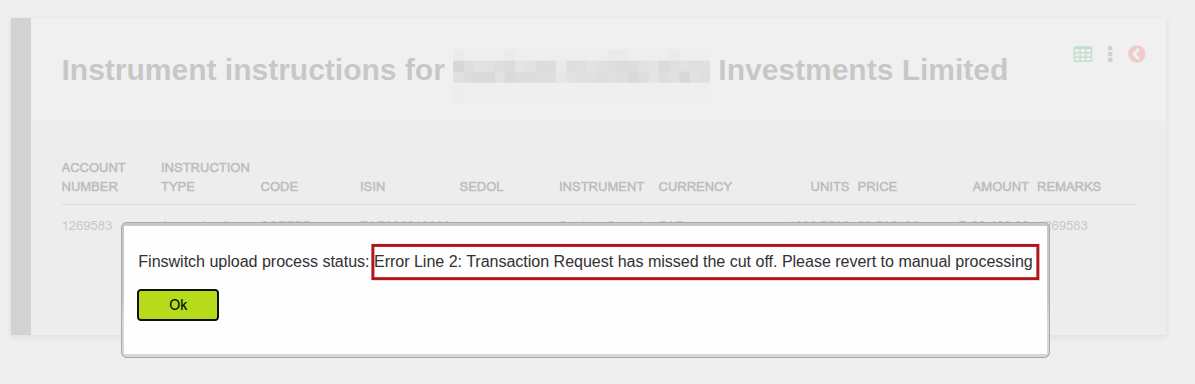
In this case, the Dealer Instruction status will be Processing, and the Finswitch status will be Error, indicating that the instruction could not be facilitated through the automated process.
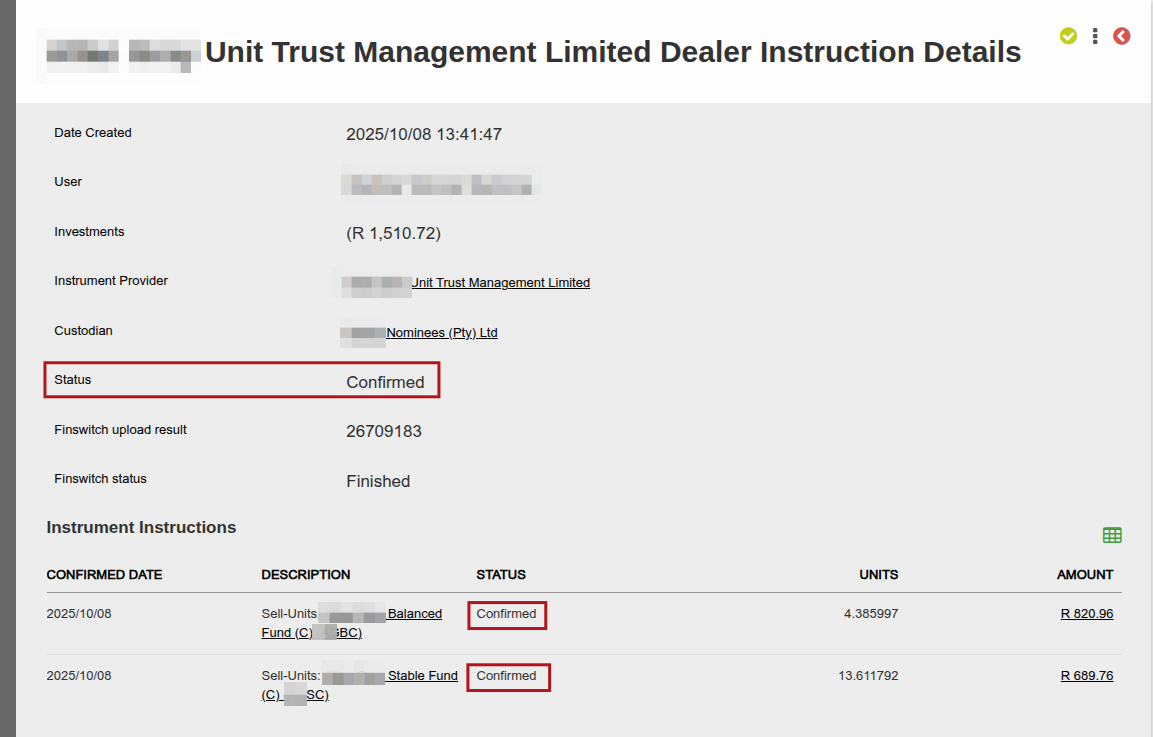
Once the Contract Notes are uploaded, or manually Confirmed by a user, the instrument instruction status will change to Confirmed after which the Dealer Instruction status will also be Confirmed.
Automatically sending Multiple Dealer Instructions at a time
Setup Required
Before using the feature to send multiple dealer instructions at a time, you first need to do the following setup:
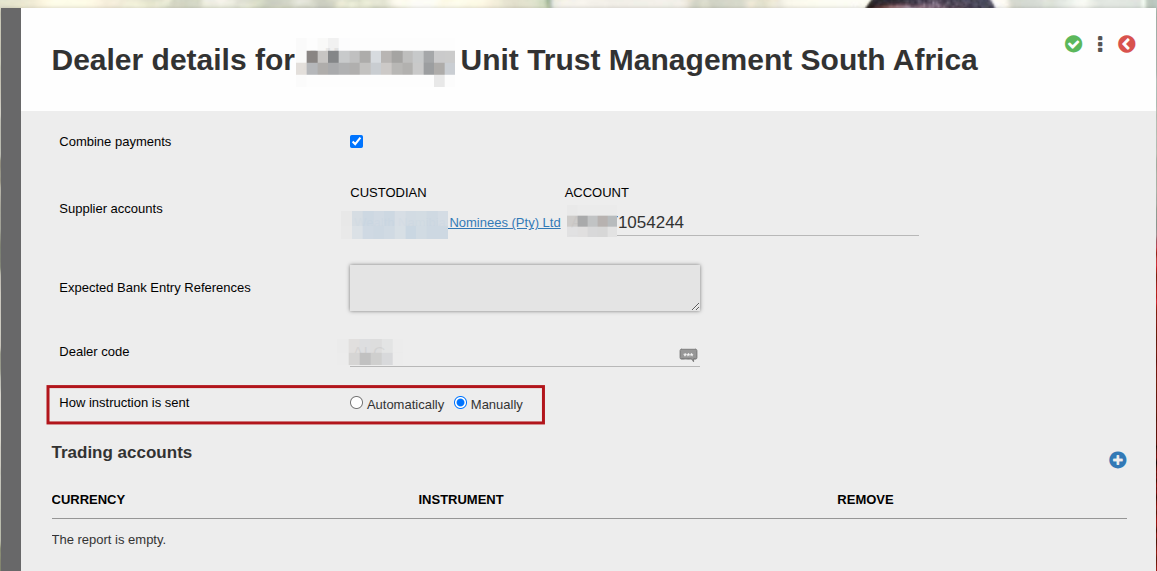
Navigate to System -> Dealers -> click on the Dealer to whom you will be sending Transaction Requests via Finswitch automatically. On the Dealer Card -> view details -> select “Automatically” in “How Instruction is sent”. This will be set to Manually by default.
Automatically Sending Multiple Dealer Instructions while creating Dealer Instructions
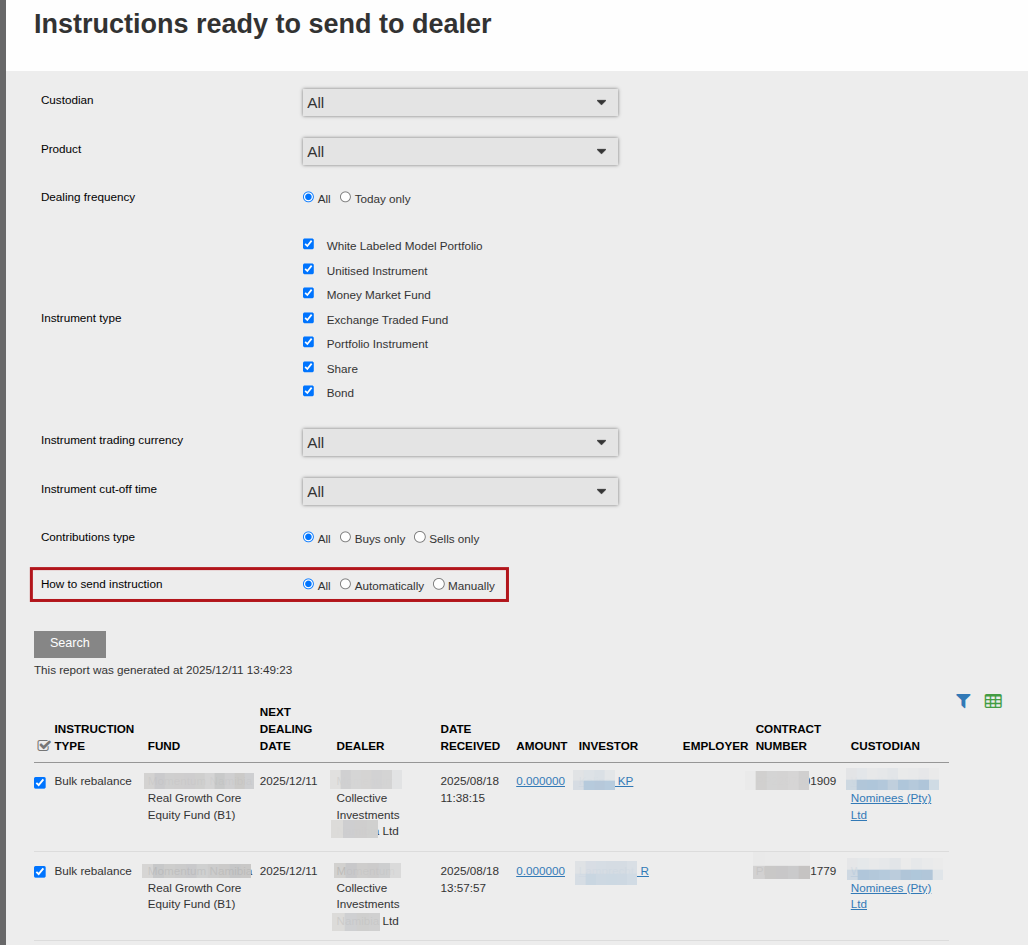
Navigate to Bulk Processes -> Dealer Instructions -> Create Dealer Instructions. Select the instructions you want to include in the Dealer Instruction and click on Create as per normal.
There is a new filter called “How to send Instruction” – this will check the setting explained above on the Dealer to see whether a Dealer is setup to send instructions to Finswitch automatically or not. The filter will by default show all instructions, but you can add Automatically then it will only show instructions where the Dealer is setup to send instructions automatically to finswitch. Or if you change to Manually it will only show instructions where the Dealer is setup to send instructions manually.
If a Dealer is not setup to be sent Automatically, and you create the Dealer instruction, then the Dealer Instruction will be created manually and will follow the manual process.
Similarly, if you create multiple Dealer instructions then each Dealers’ “How instruction is sent” configuration will be checked to determine which ones to send to Finswitch automatically and which ones to create manually.
Note that if sent manually, you can still follow the steps above to send a single Dealer Instruction via Finswitch automatically.
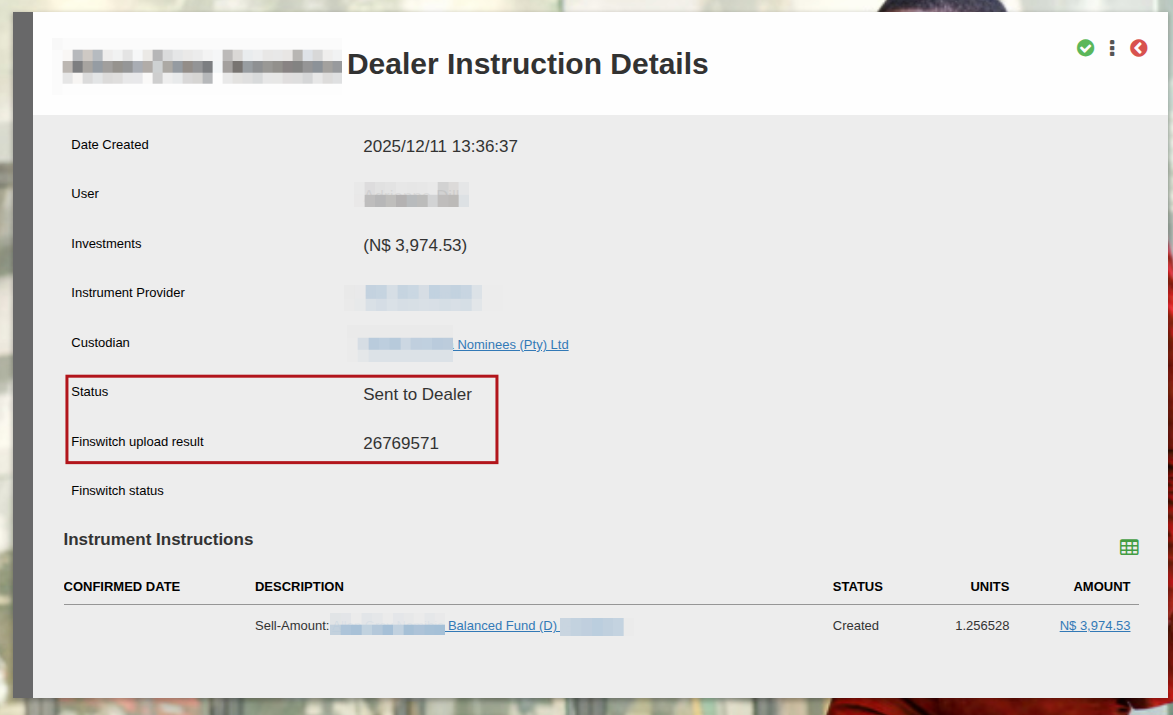
After creating, the Dealer instruction will have a new Status “Sent to Dealer” this means the request has been sent to Finswitch.
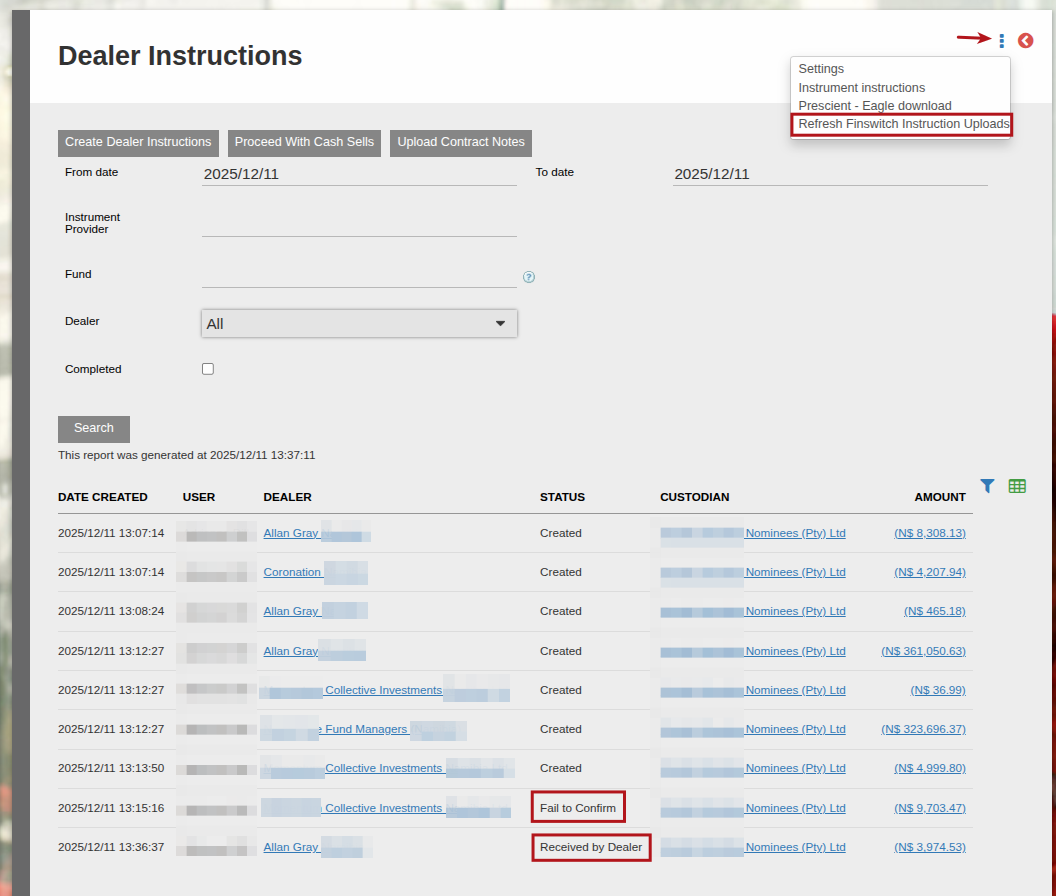
Thereafter you can return to the Dealer Instructions page, and under more actions choose “Refresh Finswitch Instruction Uploads” -> this will update the Finswitch status to either Fail to Confirm, or Received by Dealer.
If status is Fail to Confirm, you can continue using the manual process to confirm the Dealer instruction.
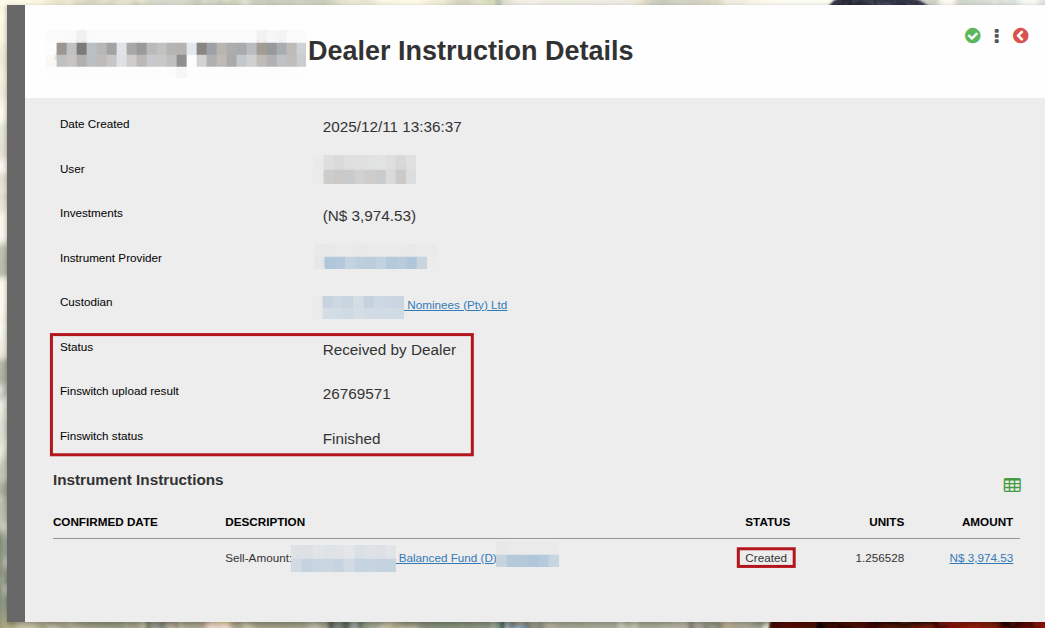
If status is Received by Dealer, it means we’ve successfully sent the request to Finswitch and Finswitch has confirmed receipt.
Note at this stage, the Instrument Instructions on the Dealer Instruction will each have a status of Created. And from here onward, the normal process will follow whereby once you receive confirmation from the Dealer, the Instrument Instruction can be confirmed and the money matched. Once all Instrument Instructions are Confirmed, the Dealer Instruction will be Completed.
Configuration required for this to work
The following information is required for the file and realtime integration and needs to be updated in the Finworks system:
A. Creating a user on Finswitch
See this help file which explains the required steps to follow.
B. System level configuration
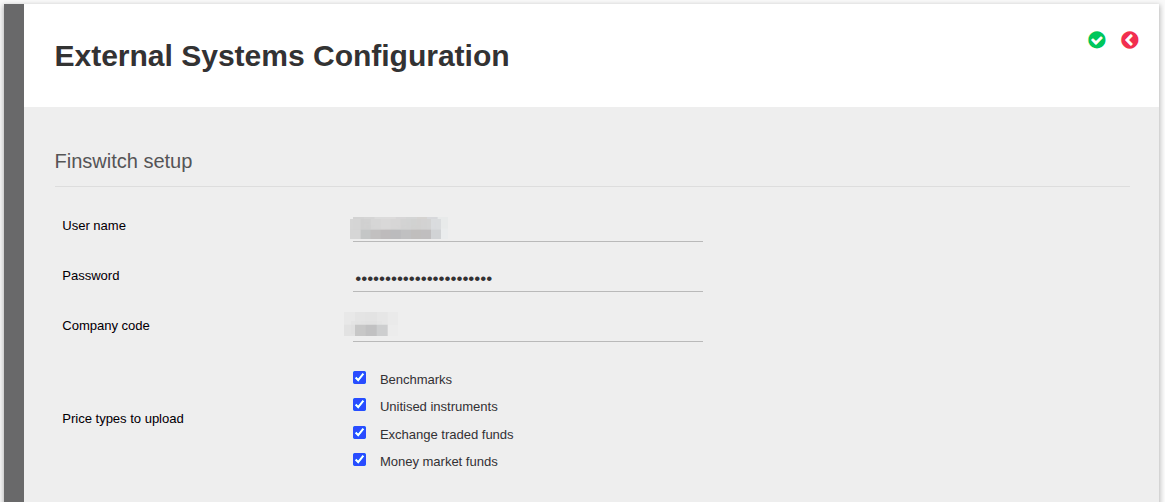
Go to System->Configuration->More Details->External systems
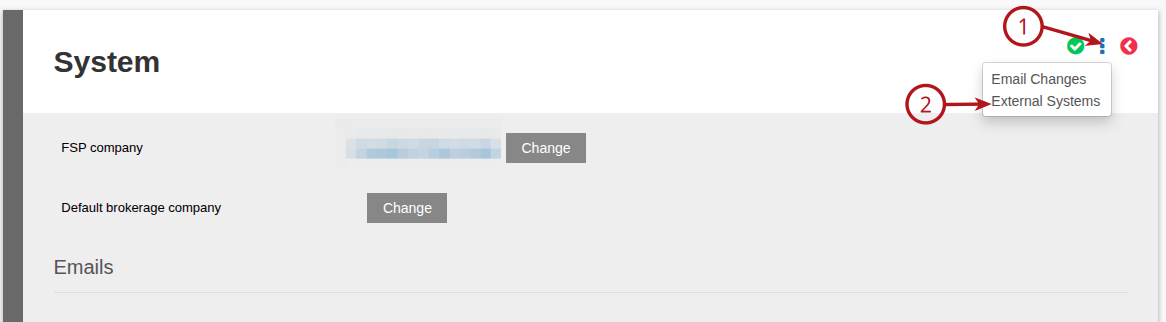
Update the following details as required: User name, Password, Company code, select the Price types to upload tick boxes required
C. Custodian level configuration
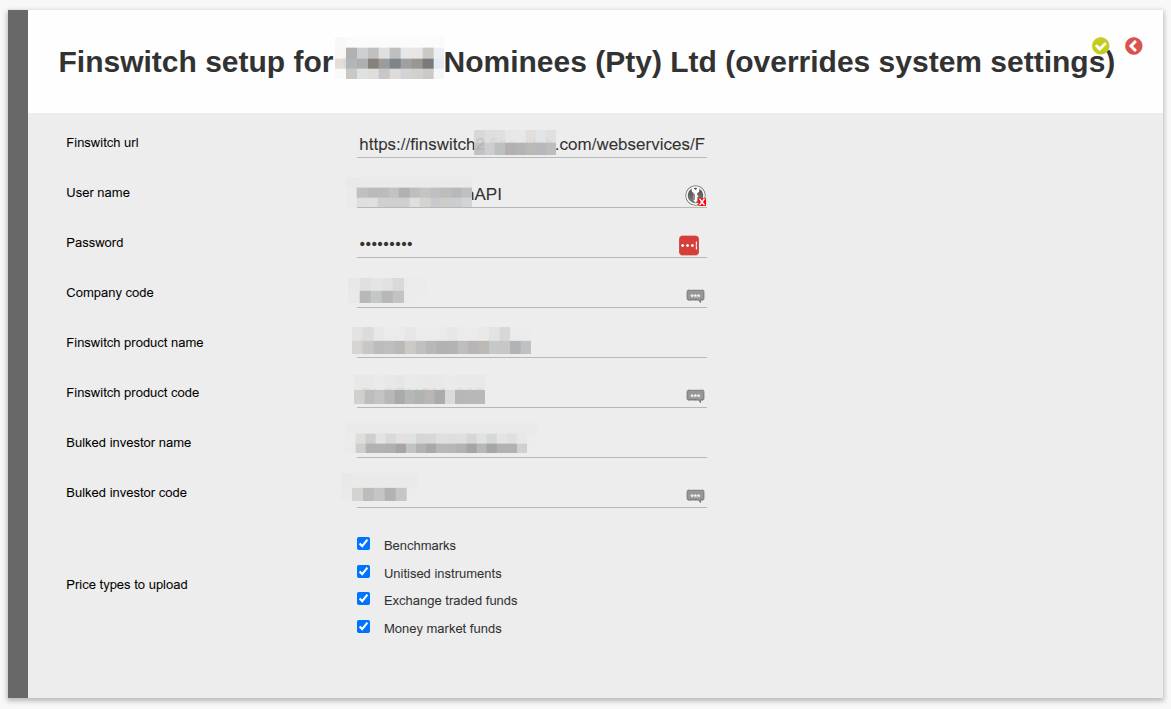
If these details are different per Custodian, you can overwrite the System settings defined above, on a Custodian. If Custodian level details aren’t provided, System level details are used as defined above.
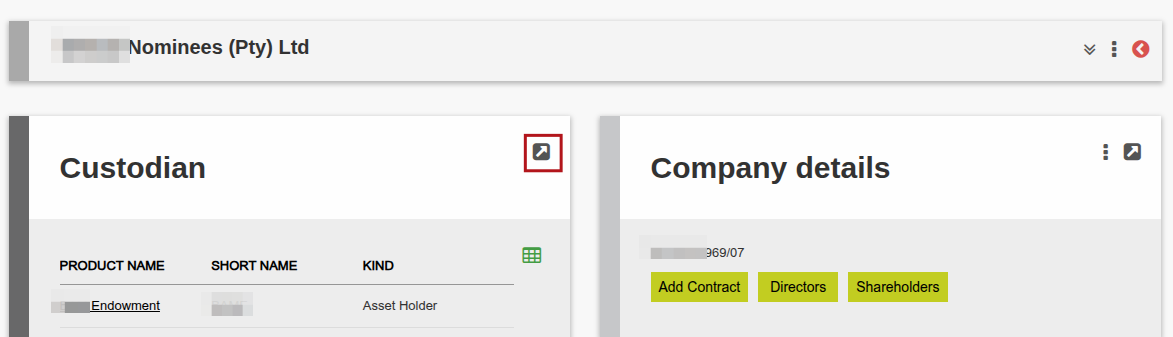
For Custodian level details, navigate to System -> Custodians -> select the relevant Custodian -> Custodian card view details:
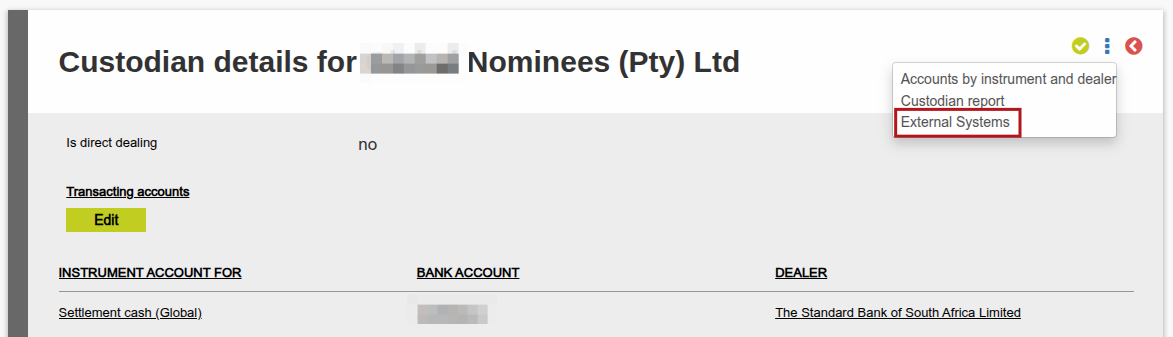
Then click on more actions -> External Systems:
Then populate the following information:
D. Instrument Provider level configuration
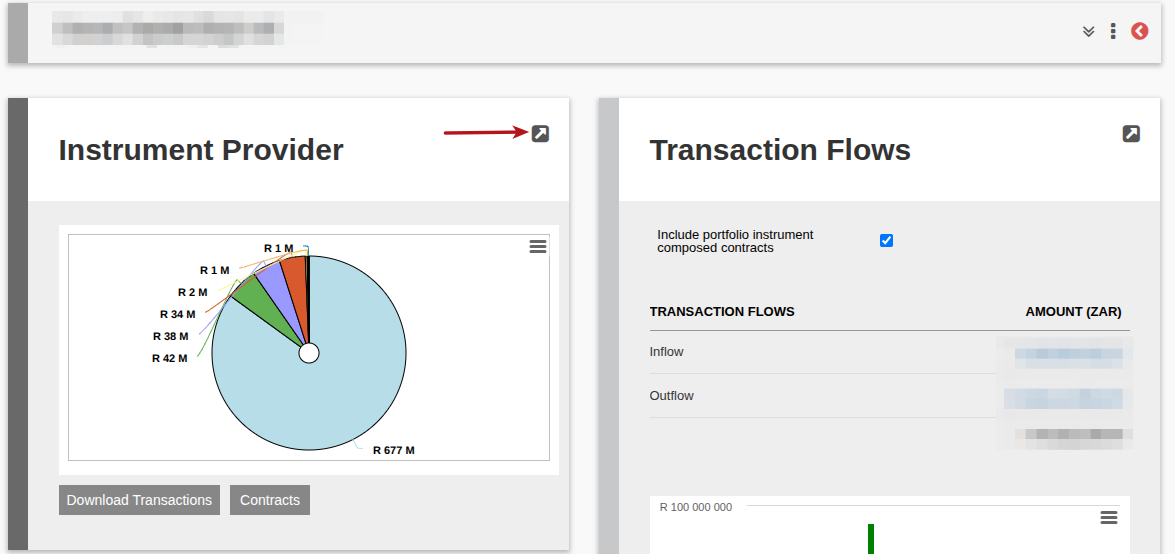
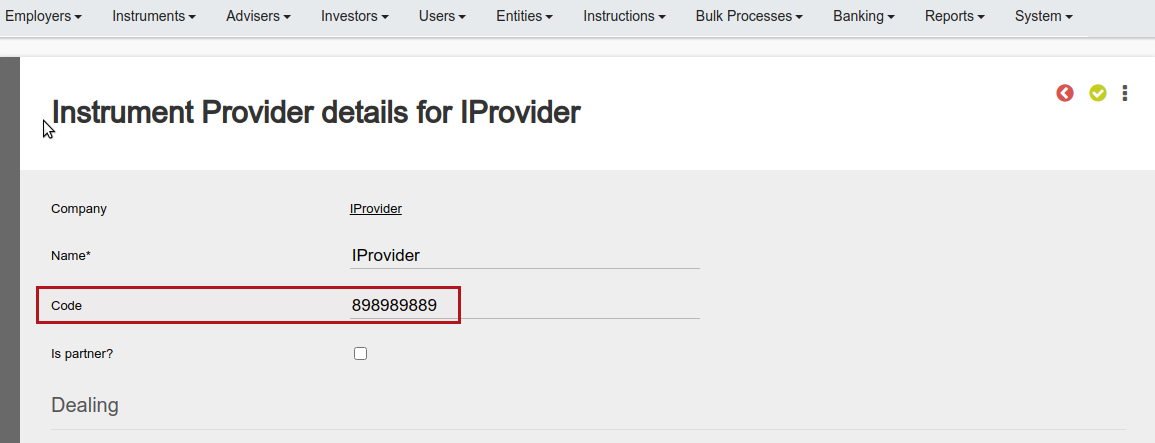
On the Instrument Provider, view the Instrument Provider card:
Last Updated on 10 months ago by Adrienne Dill